Technical and tactical characteristics of the PMD-6 mine
- Mine type
- pressure-operated anti-personnel blast mine
- Casing
- wood
- Mine weight
- 0.46 kg
- Explosive charge weight
- 0.2 kg
- Type of explosive
- TNT
- Length
- 190 mm
- Width
- 90 mm
- Height
- 45 mm
- Fuze
- MUV, MUV-2 or MUV-3 with a T-shaped pin
- Actuation force
- 1-12 kgf
- Operating temperature range
- determined by the fuze
- Color
- green/gray
- Emplacement method
- manual
Technical and tactical characteristics of the PMD-6M mine
- Mine type
- pressure-operated anti-personnel blast mine
- Casing
- wood
- Mine weight
- 0.49 kg
- Explosive charge weight
- 0.2 kg
- Type of explosive
- TNT
- Length
- 200 mm
- Width
- 90 mm
- Height
- 50 mm
- Fuze
- MUV, MUV-2 or MUV-3 with a T-shaped pin
- Actuation force
- 6-28 kgf
- Operating temperature range
- determined by the fuze
- Emplacement method
- manual

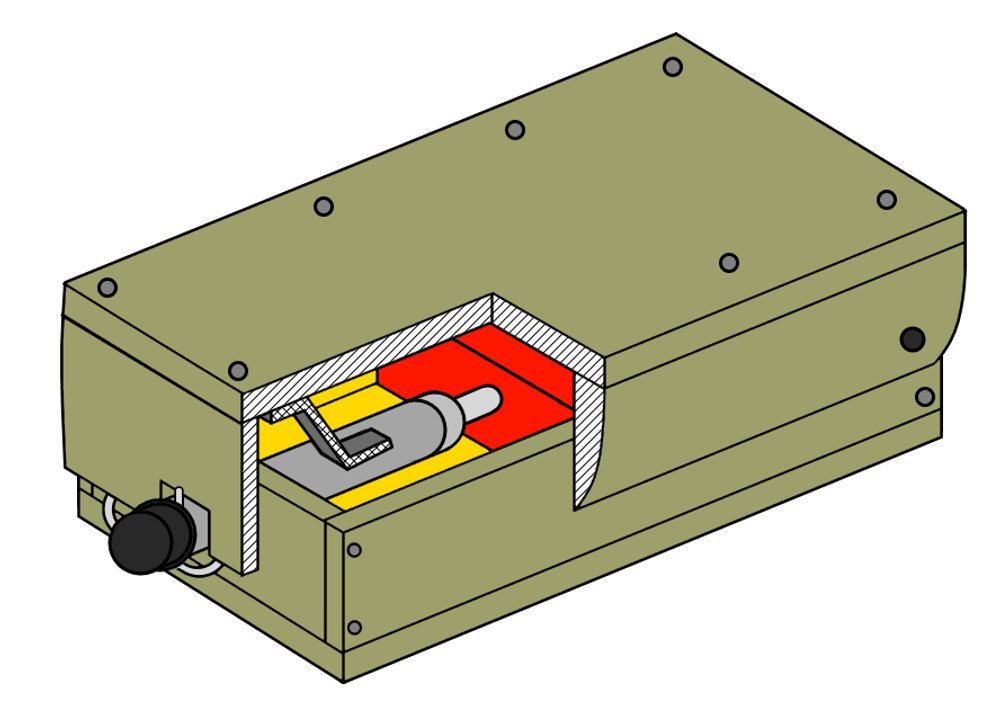
Design and principle of operation
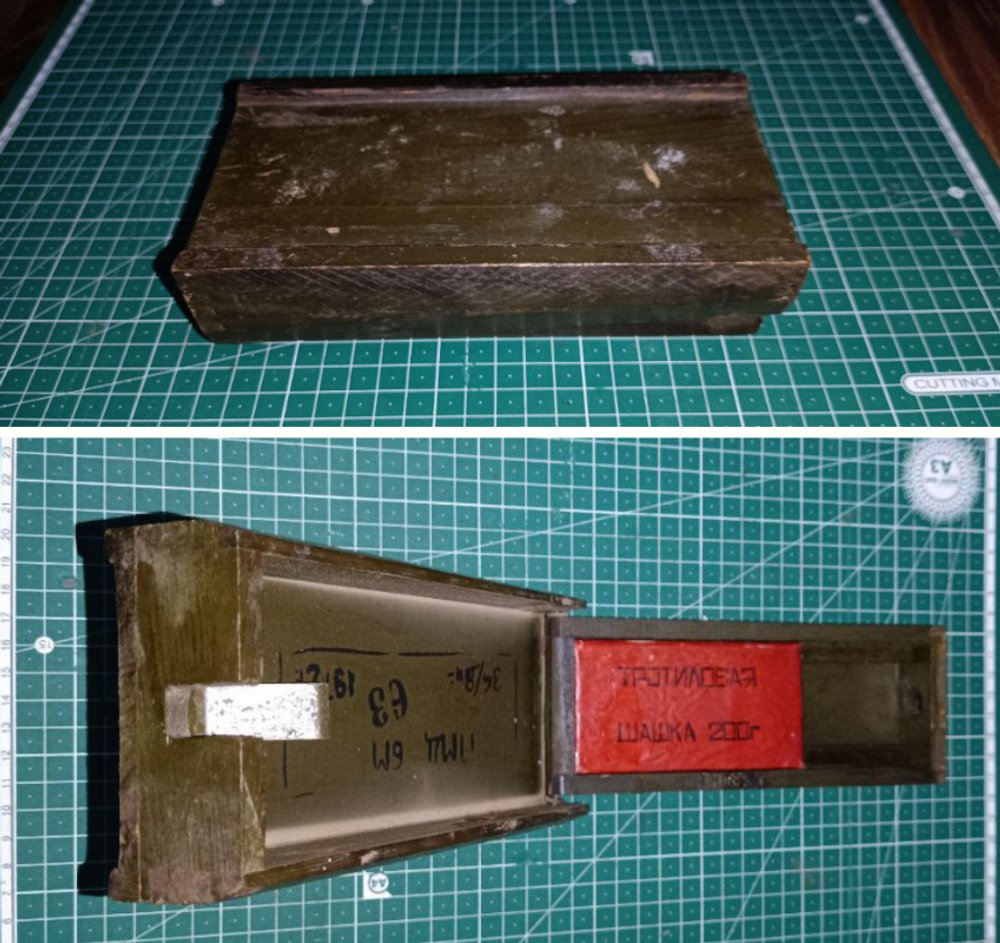
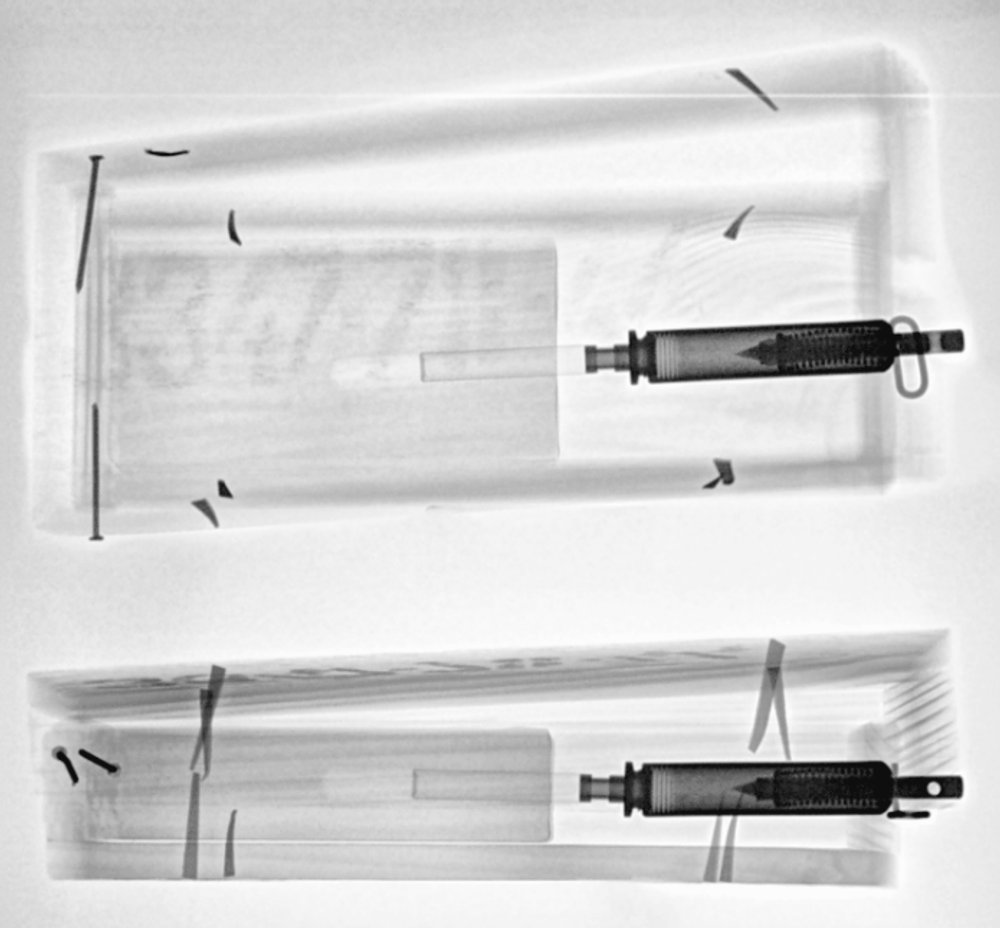
The PMD-6M mine consists of a casing, an explosive charge (a 200-gram TNT block), an MUV or MUV-2 (MUV-3) fuze with a T-shaped pin, and an MD-2 or MD-5M detonator.

For every 25 mines, a pin with an 8-meter length of twine is provided to ensure safety during mine emplacement.
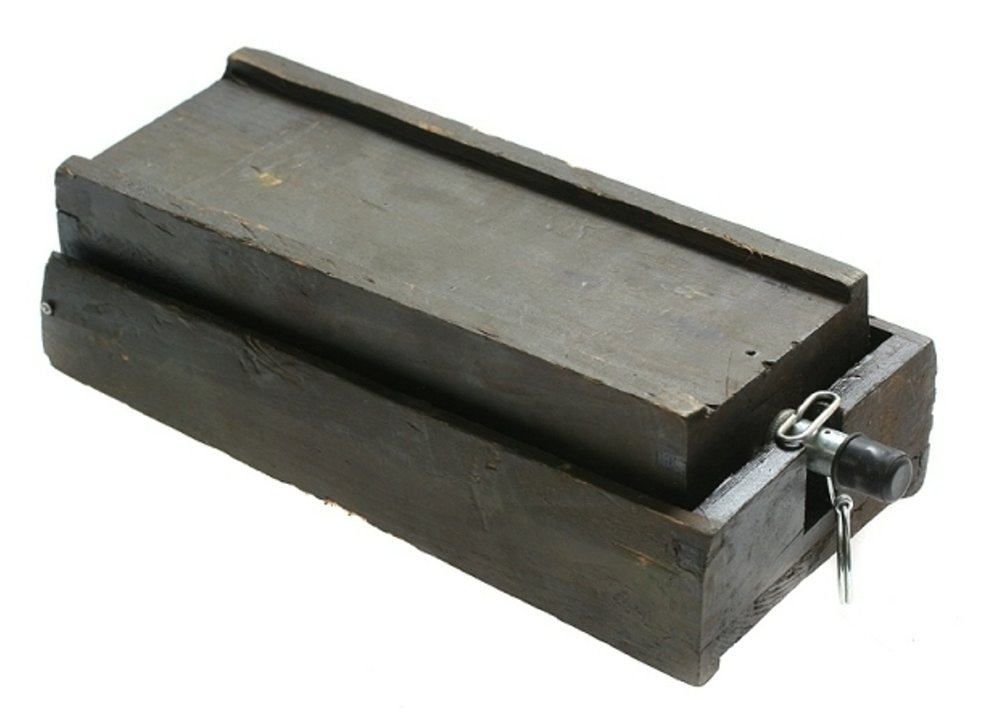
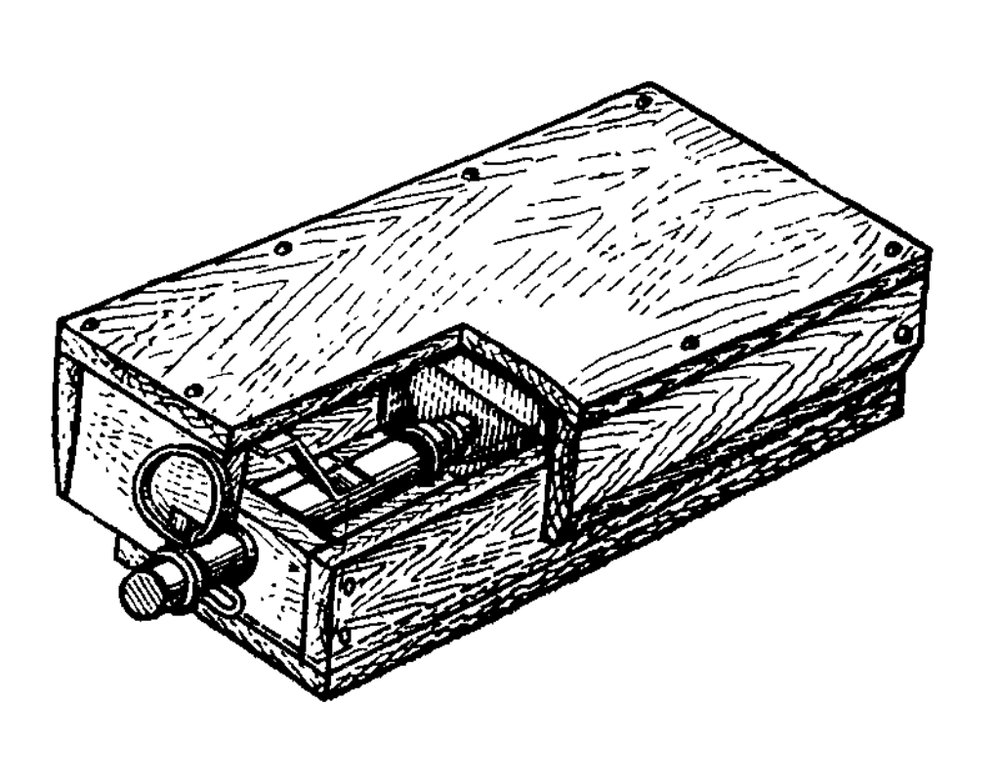
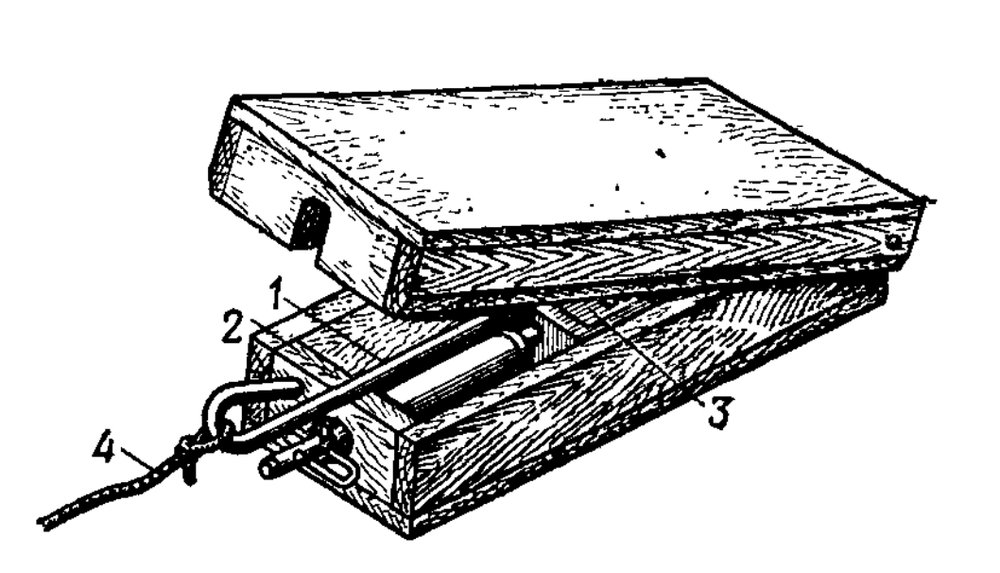
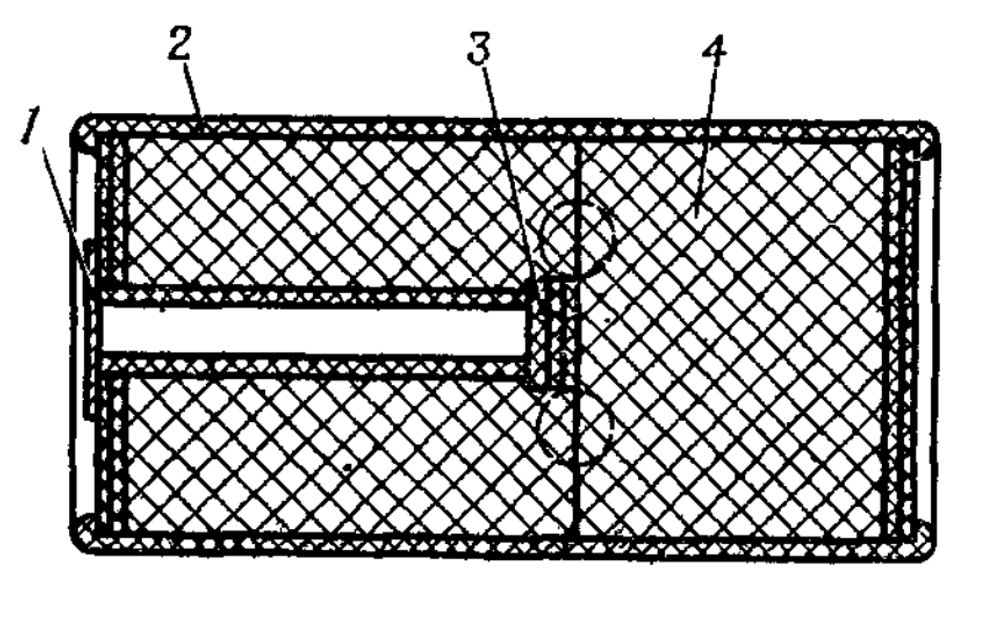
The wooden mine casing (item 5) has a hinged cover (item 1). In the front wall of the casing there is an opening for the fuze (item 3), and in the front wall of the cover there is a slot into which the stem of the MUV fuze or the sleeve of the MUV-2 (MUV-3) fuze enters. A metal plate (item 2) is attached to the underside of the cover; in the armed mine it rests on the fuze body and increases the mine actuation force.
In the combat position of the mine, the lower edge of the front wall of the cover rests on the shoulders of the T-shaped firing pin of the fuze.

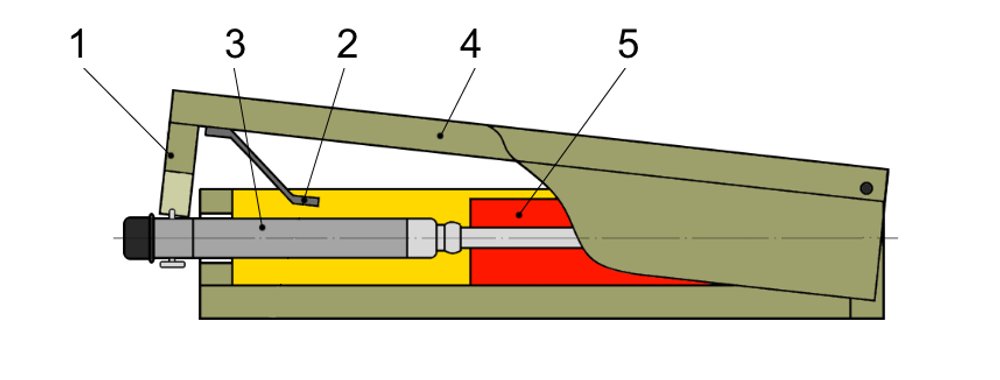
When pressure is applied to the mine cover, it moves downward and, by means of its front wall, pulls out the fuze firing pin, causing the fuze to function and the mine to detonate.
The PMD-6 mine, unlike the PMD-6M mine, does not have a metal plate.

Preparation and Emplacement
To prepare and emplace the mine, it is necessary to:
- Check the integrity of the mine casing.
- Place a 200-gram TNT block into the casing with the detonator well facing the front wall of the casing.
- Replace the P-shaped firing pin of the MUV, MUV-2 or MUV-3 fuze (if necessary) with a T-shaped one.
- Check the MUV-2 (MUV-3) fuze for the presence of the metal element, and for the presence and correct positioning of the safety pin and firing pin.
- Prepare the setting pin for PMD-6 mines by tying an 8-meter length of twine to it.
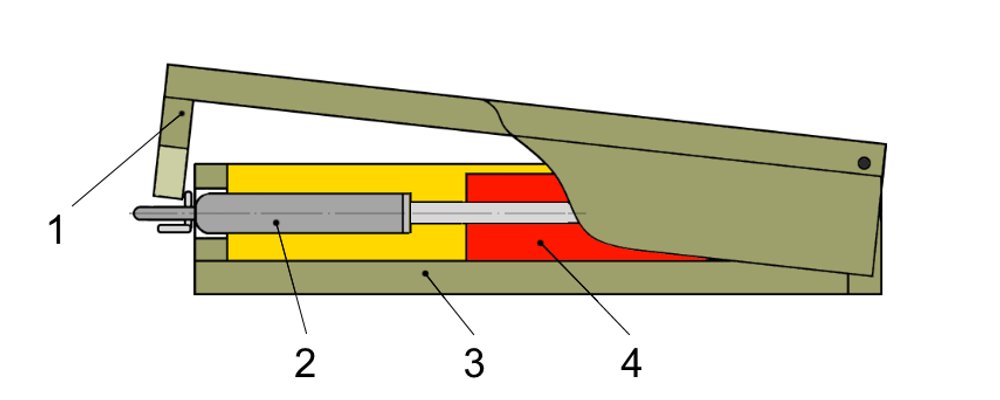
In dry or thawed soil, mines are emplaced in the ground with the cover raised 1-2 cm above the ground surface and are camouflaged with local materials (grass, leaves, loose soil, etc.) (a).
When there is snow cover, mines are emplaced in the snow and camouflaged with a 2-3 cm layer of loose snow (b).
In hard packed snow (ice), mines are emplaced in the same manner as in soil.
In frozen or very hard soil, mines are emplaced on the ground surface and camouflaged with local materials.

To emplace a PMD-6 or PMD-6M mine with an MUV-2 or MUV-3 fuze, and a PMD-6M mine with an MUV fuze, it is necessary to:
- Dig a recess in the soil to the dimensions of the mine, 3-3.5 cm deep; in loose or packed snow, make a recess 7-8 cm deep.
- Place the mine with the cover open in the recess and pierce the paper wrapping of the detonator well of the TNT block with a sharp object.
- Screw the detonator into the fuze body.
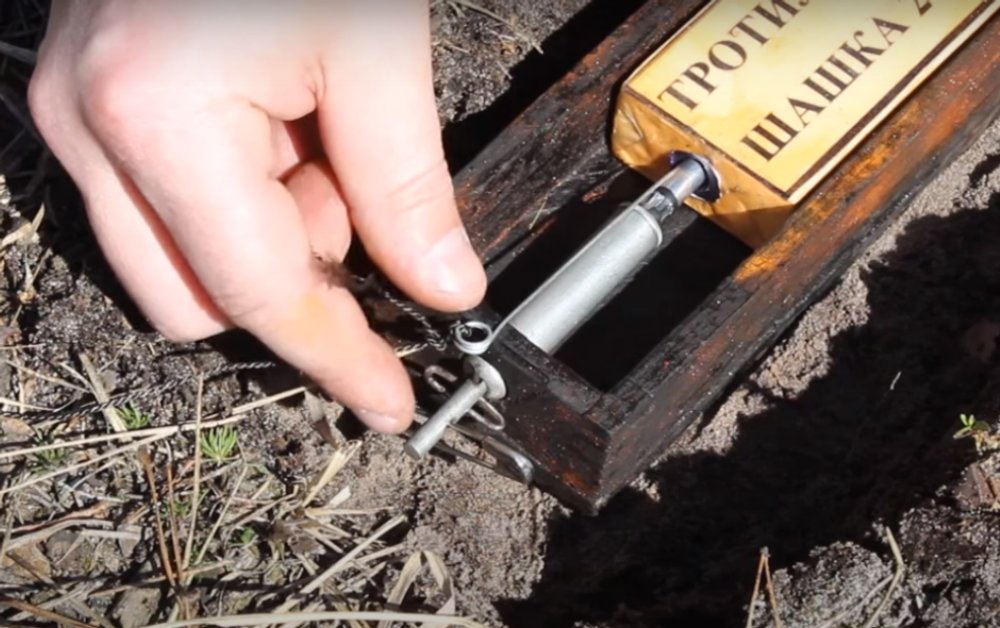
- Insert the fuze into the opening in the front wall of the mine casing so that the detonator enters the detonator well of the TNT block and the shoulders of the T-shaped pin are at the bottom and touch the front wall of the mine casing.
- Holding the mine by the casing, pull the safety pin from the MUV-2 (MUV-3) fuze.
- Close the mine cover without pressing on the shoulders of the firing pin.
- Camouflage the mine without pressing on the cover.
For safety purposes, emplacement of the PMD-6 mine with an MUV fuze is carried out using a setting pin.
To emplace a PMD-6 mine with an MUV fuze, it is necessary to:
- Carry out the operations described above, including installing the fuze in the mine in the same manner as described for mines with the MUV-2 fuze.
- Extend the twine to its full length in the direction of pulling out the setting pin; place the setting pin above the fuze on the front wall of the mine casing and the TNT block.
- Close the mine cover without pressing on it, so that the setting pin is in the slot of the front wall of the cover.
- Camouflage the mine.
- From a distance of 6-7 meters, pull the twine to withdraw the setting pin.


PMD-6 (PMD-6M) mines may be laid from trucks or by means of towed or mounted mechanical mine-laying equipment. Emplacement of the mines in the ground, fitting them with fuzes, placing them into the combat position, and camouflage are carried out manually.
Neutralization
PMD-6 and PMD-6M mines must not be neutralized. They are destroyed in place by detonating an explosive charge placed next to the mine, or by multiple passes over the minefield by tanks, tanks fitted with mine plows/rollers, or towed road rollers.
Reliable functioning of the mines when run over by road rollers and tank tracks is ensured only on level terrain.

UIPMD-6M (UIPDM-6) Training-Simulation Mines
For the manufacture of training-simulation mines, troops receive mine casings, training-simulation smoke cartridges, unloaded MUV, MUV-2 or MUV-3 fuzes, and UIMD-2 or UIMD-5M training-simulation detonators.
The smoke cartridge has a mass of 150 grams and is identical in size and shape to a 200-gram TNT block. A red stripe is applied to the cardboard casing of the cartridge, and a label indicating the smoke color is affixed to it. Smoke cartridges may be used at temperatures from -30 to +40 °C. After the mine is emplaced in the ground, the cartridge remains serviceable for 5 days. The cartridge is ignited by a UIMD-2 or UIMD-5M training-simulation detonator. When the cartridge burns, it emits white or orange smoke.
Training-simulation mines are emplaced and operated in the same manner as live mines.

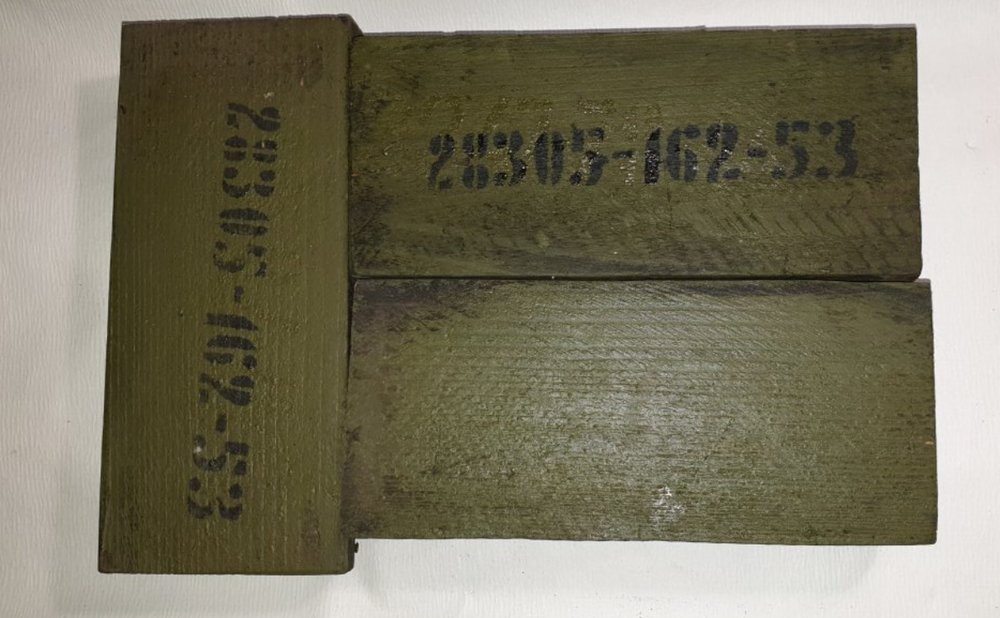
Mine Marking
- PMD-6 - mine code
- 28305 - manufacturer plant code
- 162 - lot number
- 53 - year of manufacture